
Rataton: Slimeval
Jam Lessons Learned: Blender Shape Keys and 3D-to-2D
For many, game jams are about the challenge of making complete games quickly. Just as often, they're about learning to make complete games quickly. So, when Chicago's Indie City Games announced the S.I.C.K. jam, where submissions would be played on a "long-lost console" from 1994, my first thought was, what do I want to learn from this? Interestingly, the primary theme of the jam was also a significant constraint — due to the underpowered hardware (in reality, a Raspberry Pi in a slick 3D-printed case), jammers were limited to either PS1-era 3D or 2D graphics.
My artistic focus in recent years has been 3D animation — like many, my first foray into game development was a pixel art platformer. I eventually realized that a 3D workflow, where a character animation or model could be tweaked without necessitating meticulous redrawing of hundreds of frames, is counter-intuitively much faster than making appealing pixel art. However, as compelling and nostalgic as PS1-style graphics can be, I kept thinking of the gorgeous pixel art animations I associate with 90s gaming, epitomized by Metal Slug. Further, I recalled the electrifying 2D visuals of the modern title Dead Cells, which used a clever 3D-to-2D pipeline. Inspired by these games and the jam's suggested theme modifiers (among them "slime" and "mecharat"), I decided my game would be a 2D side-scroller about piloting a rat-inspired mech to defend the sewer (the rat protagonists' ancestral home) from an invasion of slimes. I also had an idea for how I wanted to animate the slimes, which wouldn't have skeletons like most of the creatures I've made.
My focus for the jam, to the benefit of the visuals and expense of virtually everything else, had two main components:
- learning how to animate a mesh in Blender with shape keys instead of an armature
- learning a 3D-to-2D workflow using Blender and ImageMagick
I enjoyed learning these things and I want to share what a little of that here (in part to help with my own retention). I'll cover the 3D-to-2D workflow only briefly — it's well explained in a nice YouTube video that I'll link. I will assume a working knowledge of Blender's basics, such as how to use Object and Edit modes, how to use modifiers, and how to edit meshes.
Adding Shape Keys
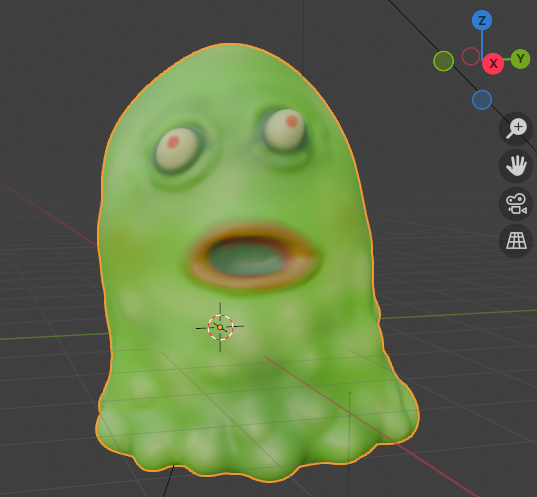
I settled upon a classic slime monster for the basic enemy. I pictured something that oozed as it moved, gooey and without any rigid bones. Animating this slime with an armature seemed like trouble — how would I organize bones to create the oozing motion for this limbless creature? While this could be done, there is undoubtedly a better approach. With shape keys, changes to the mesh can be temporarily applied in Edit Mode and then keyframed. Further, they can be endlessly combined and interpolated. The extent to which each of the shape keys affects the mesh can be specified on any individual frame of the animation. Shape keys struck me as an ideal approach to animating the slime model. Here's a quick explanation of how to use them, where I'll use my slime model as an example.
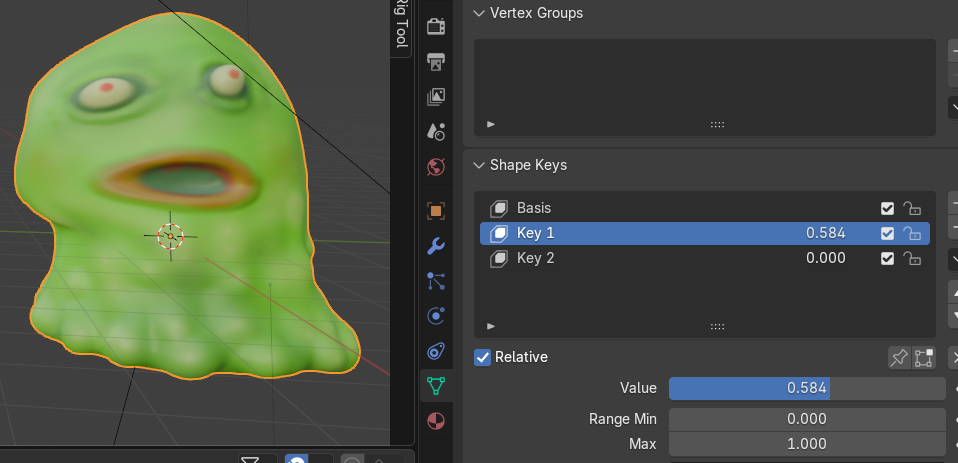
To add shape keys, select the mesh and go to the Object Data Properties on the sidebar (upside down green triangle). There, below vertex groups, you will find the Shape Keys section. When you begin, the box will be empty.
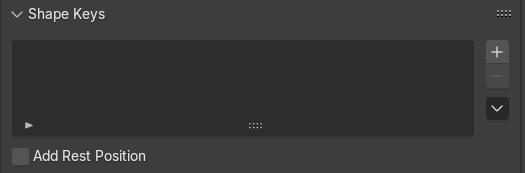
Clicking the "+" button on the right will add a "Basis" shape key. The basis is just a shape key representing the unmodified mesh. This serves as a frame of reference for other shape keys.
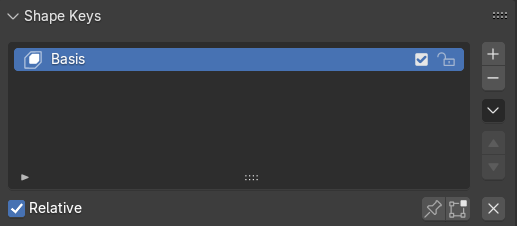
If you keep adding shape keys, the default names will be "Key 1", "Key 2", etc. To introduce an adjustment to the mesh as a shape key, select the shape key, then go into Edit Mode. Whatever change you apply to the mesh will be saved to the shape key. Do not worry that the mesh will be permanently affected if a shape key for the mesh is selected. However, do not create or remove vertices in your shape keys — doing so can lead to visual artifacts and unexpected effects on other shape keys. Generally, the mesh geometry should be finalized before you begin adding shape keys.
Relative Versus Absolute Shape Keys
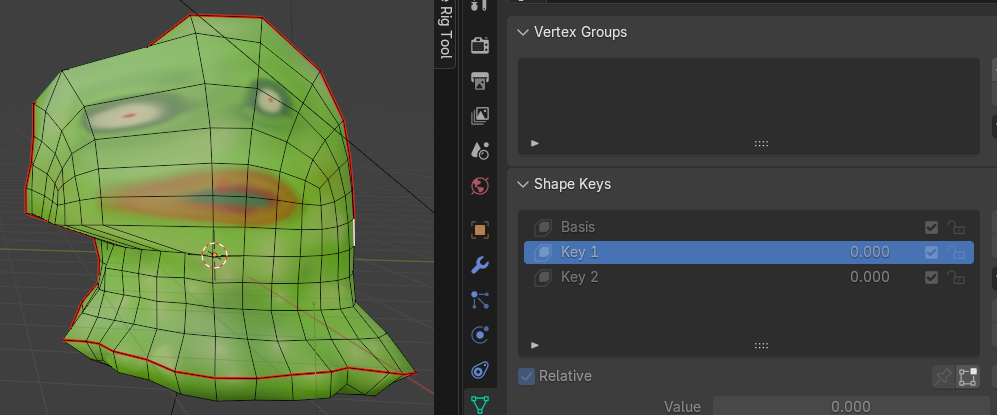
Note the "Relative" checkbox below the list of shape keys, which is checked by default. With this box checked, shape keys will be defined in terms of their differences from the basis. The numerical values that appear next to them indicate how much they are interpolated between the basis and the respective shape key, where 0 means there is no interpolation (they do not affect the mesh) and 1 means they fully distort the mesh as you specified in Edit Mode. The range can be extended beyond 0 and 1 using the "Range Min" and "Max" values found below. If more than one shape key has non-zero values (and "Relative" is checked), then each with a non-zero value will affect the mesh. The total effect will depend on the relative values as the mesh is interpolated between them. You can see the impact of changing the shape key "Value" in Object Mode.
If "Relative" is not checked, then the numbers to the right will be times, and the interpolation will be based on the "evaluation time" below. Each shape key will represent a sequential moment in time, and an "absolute" change of the mesh (unrelated to the basis, which will simply be the starting point).
For my animations, I chose to use "Relative". This is because I found that while my basic animations used just a few exaggerated shape keys, I could add slightly non-zero values from others to add a bit of pseudo-randomness, which gave them a more natural feel. Of course, the same effect could be achieved with absolute shape keys, but it would have required considerably more time and effort.
A few quick tips:
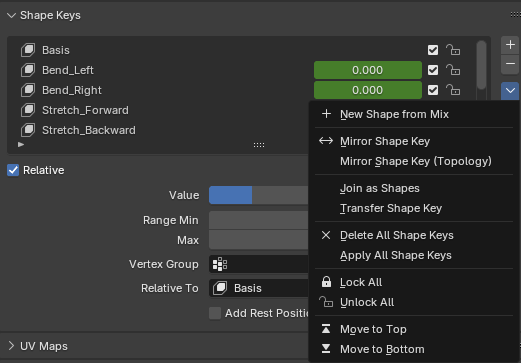
- If you want to make adjustments from shape keys permanent, you can click on the downward pointing arrow below the "-" key and click "Apply All Shape Keys". This will preserve the changes to the mesh as shown and delete the shape keys.
- In the same menu, "New Shape From Mix" will create a new shape key from currently applied shape keys.
Animating Shape Keys
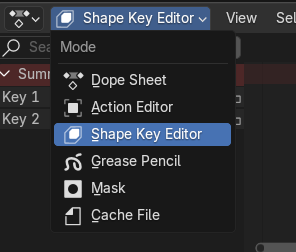
In the Animation workspace, clicking on the Dope Sheet drop-down menu will show the Shape Key Editor.
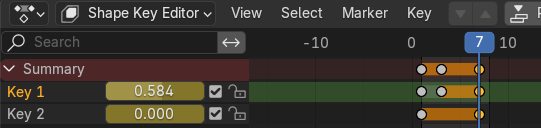
Any shape keys that you've created will already be visible on the left. In order to insert key frames for each shape key, you first need to go to the shape key section of the Object Data Properties sidebar and click the small circle next to the "Value" — it will turn into a rhombus. This will allow animation of the property value — the numerical value will turn yellow, indicating that it can be animated.

Now you can create keyframes in the shape key editor sheet by right clicking and inserting as usual. With a particular key frame selected, you can adjust the interpolation value of the shape key on the left.
Note that the key frames will automatically be associated with the action you have selected in the Action Editor.
At this point animations can be rendered and exported from Blender. Here are a couple examples as they appear in-game after downscaling and rasterization. The first animation, which is for the slime's idle state, is cycling through several key frames that slightly tilt and stretch the model in different directions to create the wobbling effect. The second, which was to show the slime's death upon defeat, uses only one keyframe — the animation is just a smooth interpolation from the basis to the "puddle" keyframe.

There is just the tip of the shape keys iceberg, but hopefully it was a sufficient introduction.
The 3D-to-2D Pipeline
With the models rigged and animated, I moved on to the next question: how to efficiently produce 2D sprites sheets for use in Godot? I found a very useful YouTube tutorial: How to Make a Sprite Sheet from a 3D Animation in Blender. In brief, there's an open-source tool called ImageMagick that can convert frames rendered by Blender into sprite sheets. The tutorial is concise and worth the watch, but here are a few handy highlights from the Blender steps:
- Under render properties, go to Film and then check the "Transparent" box to export frames with no background.
- Using an orthographic camera can make the sprites more convincingly 2D
- Make sure you adjust the camera scale so that the entire model is visible for every frame of animation
- Downscaling can be handled by ImageMagick or later in an image editor like GIMP. Rendering at higher resolution in Blender will give you more flexibility if you change your mind about a later step in the workflow (e.g. at what resolution you want to rasterize)
I found Blender's Python scripting functionality useful for automating sprite sheet generation for all actions — otherwise it can get tedious to run the ImageMagick command repeatedly. I've included the script below. If you read through the comments, you'll find it outlines the whole process (excluding post-processing that you may want to do in an image editor). If you are making sprites for multiple characters in the same Blender file, it is worth noting the frame output resolution and the parameters you use for your camera.
import bpy
import os
import subprocess
import math
import glob
# Define output directories for frames from Blender and sprite sheets from ImageMagick
frames_output_path = r"C:\\your\path\here\frames"
spritesheet_output_path = r"C:\\your\path\here\spritesheets"

# Target object - make sure the armature or shape-keyed mesh is selected
target_object = bpy.context.object
# Specify which actions to render
actions_to_render = ['Idle','Run','Shoot']

for action in bpy.data.actions:
    print(f"\nRendering action: {action.name}")
    if not action.name in actions_to_render:
        continue
    # Ensure animation data exists
    if target_object.animation_data is None:
        target_object.animation_data_create()

    # Assign action
    target_object.animation_data.action = action
    # Get frame range
    frame_range = [int(action.frame_range[0]), int(action.frame_range[1])]
    start_frame = 1
    end_frame = frame_range[1]
    step = 2 # I used step > 1 for aesthetic reasons, to add to the illusion that the art was hand-drawn.
    bpy.context.scene.frame_start = start_frame
    bpy.context.scene.frame_end = end_frame
    bpy.context.scene.frame_step = step

    # Set output directory for each set of frames - make the directory if necessary
    action_output_dir = os.path.join(frames_output_path, action.name)
    bpy.context.scene.render.filepath = os.path.join(action_output_dir, "")
    os.makedirs(action_output_dir, exist_ok=True)

    # Render frames
    bpy.ops.render.render(animation=True)
    # Count number of rendered PNGs
    frame_files = glob.glob(os.path.join(action_output_dir, "*.PNG"))
    frame_count = len(frame_files)
    if frame_count == 0:
        print(f"No frames found for {action.name}, skipping.")
        continue
    # Calculate tile layout (e.g. 5x3)
    # use ceiling to ensure that all sprite frames can be included
    cols = math.ceil(math.sqrt(frame_count))
    rows = math.ceil(frame_count / cols)

    # Output path for spritesheet
    output_file = os.path.join(spritesheet_output_path, f"{action.name}.PNG")
    input_pattern = os.path.join(action_output_dir, "*.PNG")
    # Define montage_cmd - mostly self-explanatory - Catrom is the interpolation algorithm used to downscale
    montage_cmd = (
        f'magick montage {input_pattern} -geometry 230x230 '
        f'-tile {cols}x{rows} -background transparent -filter Catrom "{output_file}"'
    )
    # Run ImageMagick
    subprocess.run(montage_cmd, shell=True)
Here's an example animation that has been downscaled but not rasterized.

Happy animating, and try out the game if you have an Xbox controller handy!
Leave a comment
Log in with itch.io to leave a comment.